How to Upgrade Windows 10 to Windows 11 without Losing Data
Windows 10 reached the end of its regular support lifecycle on October 14, 2025. This guide shows how WinUpgradeMate can prepare an upgrade for a Windows 10 PC that is blocked by Windows 11 hardware checks.
Download and install WinUpgradeMate
Download WinUpgradeMate on the Windows 10 PC you plan to upgrade, finish the installation, and launch the app.
Download the official Windows 11 ISO
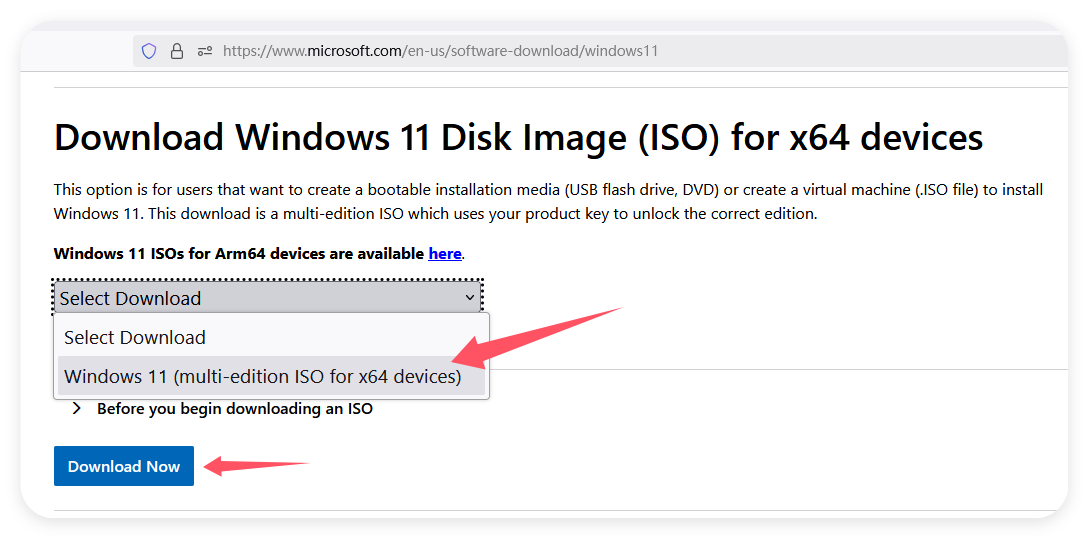
Get the current Windows 11 disk image directly from Microsoft. On the download page, choose the Windows 11 disk image, select your language, and download the appropriate 64-bit image for your PC.
Open Microsoft’s Windows 11 download page →
Import the ISO and choose Quick Setup
Open WinUpgradeMate, click Browse, select your Windows 11 ISO, keep Quick Setup Method selected, and click Start Upgrade.

WinUpgradeMate prepares the upgrade and opens Windows Setup. The setup window may use server-style setup wording during this method, but the edition ultimately installed is based on the Windows 11 media and license you select.

Choose to keep your files and apps
Continue through Windows Setup. When the Choose what to keep screen appears, select the option that keeps your files, settings and apps, then continue.

Complete the Windows 11 upgrade
Confirm the installation and allow the PC to restart as needed. When setup finishes, complete the normal Windows onboarding steps.

Quick Setup did not work?
Use the Standard Setup Method only as the fallback path. It is intentionally kept secondary so most users can follow the shorter recommended workflow first.
Show Standard Setup Method
1. Import the ISO and choose Standard Setup
Select the Windows 11 ISO, choose Standard Setup Method, and click Start Upgrade. WinUpgradeMate applies the compatibility configuration automatically.

2. Confirm the operation
When the compatibility confirmation appears, click Continue.

3. Continue with Windows 11 Setup
Follow the Windows 11 Setup wizard, allow it to check for updates, and choose Keep personal files and apps.


Frequently asked questions
Will this delete my files?
The workflow is designed around an in-place upgrade. Make sure Windows Setup shows the option to keep personal files and apps before you install. A separate backup is still recommended before any operating-system upgrade.
Do I need to edit the Registry manually?
No. The recommended Quick Setup workflow is intended to avoid manual command-line or Registry editing. The Standard Setup path is available as a fallback inside the app.
Where should I get the Windows 11 ISO?
Use Microsoft’s official Windows 11 download page rather than an unknown third-party ISO source.