WinBootMate: Unlock Windows 11 on Any PC – No TPM, Secure Boot, or CPU Limits!
 Last Updated on Mar 10, 2026 by Adams Steven ( Comments)
Windows 11 comes with strict system requirements, including TPM 2.0, Secure Boot, and supported CPUs. But what if your PC doesn't meet these criteria? That's where WinBootMate steps in, allowing you to bypass these limitations and install Windows 11 on any computer. Whether you're using an older device or a custom-built rig, WinBootMate ensures a seamless installation without frustrating compatibility checks.
[Updates] You can now run WinBootMate on Windows 11/10/8/7 and macOS sequoia (including Apple Silicon Mac).
How WinBootMate Bypasses Windows 11 Restrictions
First of all, download and install WinBootMate on a PC. WinBootMate is available in two versions, catering to both Windows and Mac users. You can download the appropriate version for your operating system
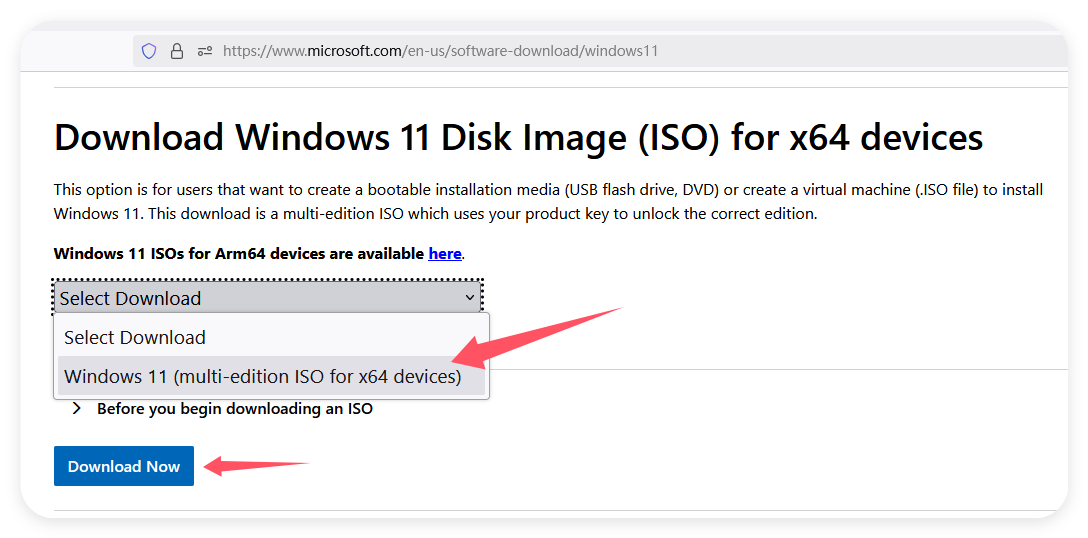
Step 1 Download Windows 11 ISO File from Microsoft
You can download the official Windows 11 ISO file from Microsoft's website. Microsoft website >>
- Scroll down to “Download Windows 11 Disk Image (ISO)”
- Select Windows 11 version
- Hit Confirm, then download the 64-bit ISO
Step 2 Plug in a USB Drive and Launch WinBootMate
Connect a USB flash drive to the computer and make sure you can see the USB name from Finder app sidebar. Now, open WinBootMate on your computerfrom and click the Windows 11 Bypass option.

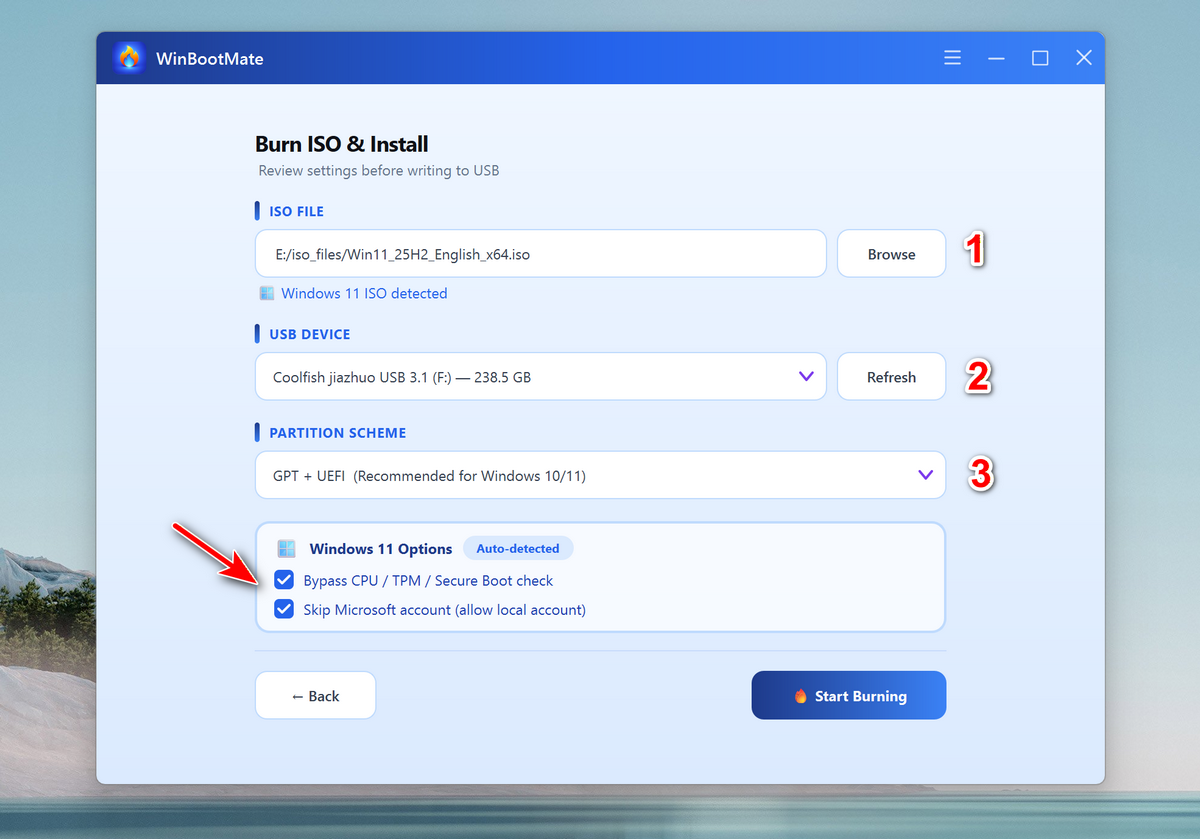
Step 3 Import Windows ISO and Enable Windows 11 Bypass Option
From the main screen, click the Browse button to add Windows 11 ISO into the app. Next, select the USB drive and choose a partition scheme. For Windows 11 ISO, please choose GPT + UEFI partition scheme at this time.
The Bypass CPU/TPM/Secure Boot Check and Skip Microsoft account options are enabled by default when Windows 11 ISO is detected in WinBootMate. WinBootMate app will patch the Windows 11 ISO and remove Windows 11 system restrictions.This will allow you install Windows 11 on unsupported hardware!
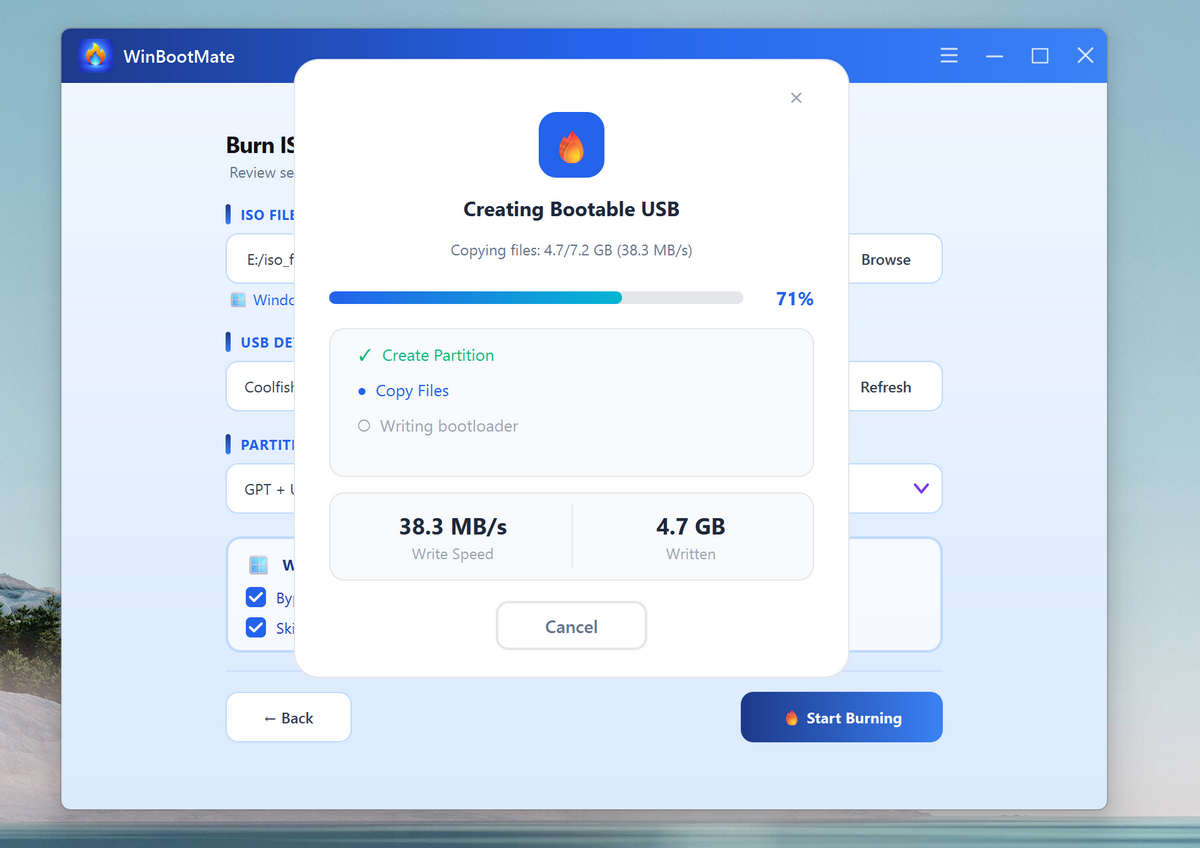
Step 4 Start Burning Windows ISO to USB
When all the settings are completed, please click the Start Burning button at the bottom of the screen to start the bootable USB creation process. The USB drive will be formatted. Please make sure you have backed up the data in it. After that, there is a process bar indicating the burning task. You need wait a couple of minutes before it is done for a fast USB 3.0 drive.
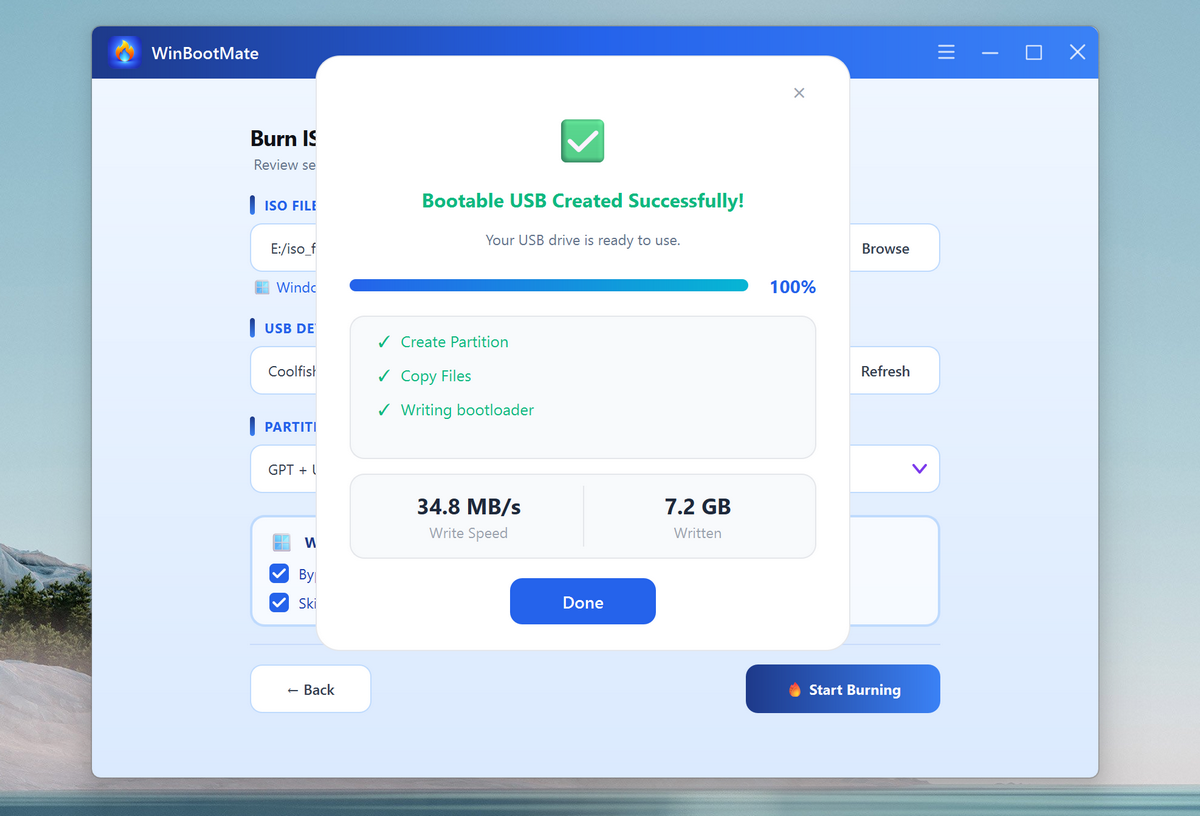
Step 5 USB Burning Completed
When the USB burning task is completed successfully, you will receive a prompt for that at the end. Please eject the USB and use it to install Windows 11 on any other unsupported PCs.
Step 6 Boot the Target Computer from USB
After the boot disk is created, insert it into the computer and set it to boot from USB. Generally, press and hold F2, F11 or Del key during startup. At this time, you will enter the installation interface of the Windows system like below.
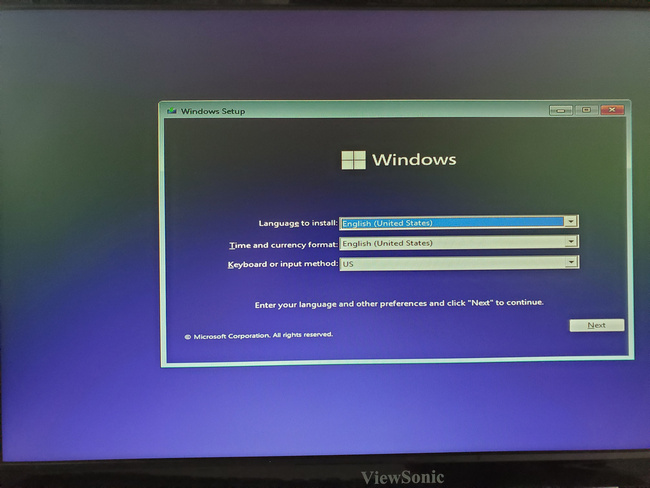
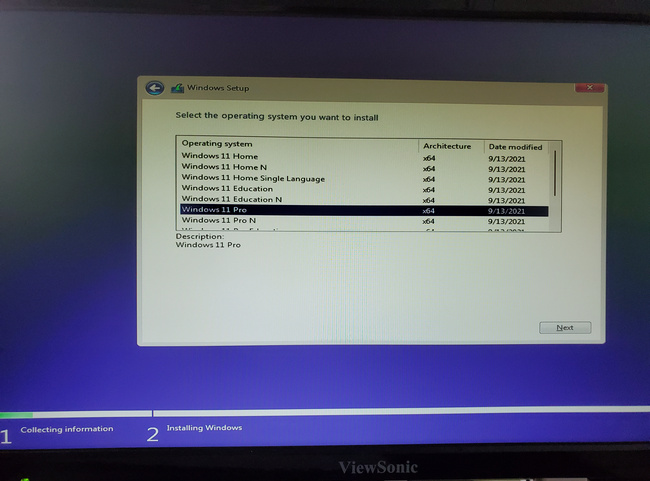
Step 7 Install Windows 11 on an Unsupported Hardware
Select language, country, etc. and select Next, then click install now button. Different Windows system versions will be listed at this time, including 64 and 32-bit. You can select the version you need and click Next to start installing the system.
Since the restrictions have been removed, your system won't run into TPM or Secure Boot errors.
What Can WinBootMate Do:
- Install Windows 11 without TPM or TPM 2.0.
- Install Windows 11 without Secure Boot and UEFI.
- Install Windows 11 on unsupported CPU.
- Download Windows 11/10/8/7 ISO.
- Upgrade Windows 10 to Windows 11 without Losing Data.
If your PC doesn't meet Windows 11's official requirements, WinBootMate is the ultimate solution to break free from Microsoft's hardware restrictions. Whether you're reviving an older machine or testing Windows 11 on unsupported hardware, this tool gets the job done effortlessly. Ready to unlock Windows 11? Download WinBootMate today and install Windows 11 on your terms!
💬 Reviews