How to Easily Create a Windows 10 Bootable USB on Mac (Support Intel and M1/M2/M3 Mac)
In a world where versatility and flexibility in technology are more crucial than ever, the need to create a Windows 10 bootable USB on different hardware architectures is a skill that can significantly enhance productivity and troubleshooting capabilities. Whether you're a developer aiming to test applications across platforms, an IT professional tasked with diverse system support, or an enthusiast looking to run Windows on your Mac, the year 2024 has streamlined the process.
Now, creating a Windows 10 bootable USB on the latest Intel-based and Apple's M1, M2, and M3 Macs is not only possible but also remarkably user-friendly. This guide will walk you through the straightforward steps to make a Windows 10 bootable USB on a Mac.
What is a Windows 10 Bootable USB Used for?
A Windows 10 bootable USB is a portable drive that contains the Windows 10 operating system installation files. It is used for several purposes:
- Install Windows 10 on new device: It allows you to install or reinstall Windows 10 on a computer without needing the original installation disc. This is particularly useful for devices for newly build PCs.
- Repair Windows 10: If your system is failing to boot or has become corrupted, you can use the bootable USB to access Windows recovery options, such as System Restore, Startup Repair, or the Command Prompt, to fix the issues.
- Upgrade OS: It can be used to upgrade an older version of Windows to Windows 10, assuming the hardware meets the necessary requirements.
- System Maintenance and Troubleshooting: Advanced users can use the bootable USB to perform system maintenance tasks, such as creating and restoring system images, managing partitions, or wiping the hard drive.
The Challenge for Creating Windows 10 Bootable USB on Mac
Creating a Windows 10 bootable USB on a Mac in 2024 can present several challenges, especially considering the hardware and software transitions that have occurred over the past few years. Here are some of the potential challenges one might face:
- Install.wim file is too large: macOS does not support NTFS file system by default. The install.wim file in the Windows 10 ISO image is bigger than 4GB so it can not be copied to a USB drive with FAT32 partition. You have to split the install.wim file to make the USB working as a bootable device.
- Lack of software tools: The most popular bootable USB creation tool such as Rufus and Media Creation Tool does not have a Mac version. It is really hard to find a proper app for doing this task.
- Removal of Bootcamp App: In the past, Bootcamp was the native app to make Windows 10 bootable USB on Mac. Unfortunately, it was removed from Apple Silicon Mac.
[2024] How to Easily Create a Windows 10 Bootable USB on Mac
With the help of WinBootMate app, it becomes a simple task to make a Windows 10 bootable USB no matter it is an old Mac with Intel process or the new Mac model powered by Apple M1/M2/M3 chip. Please follow the steps in the coming section.
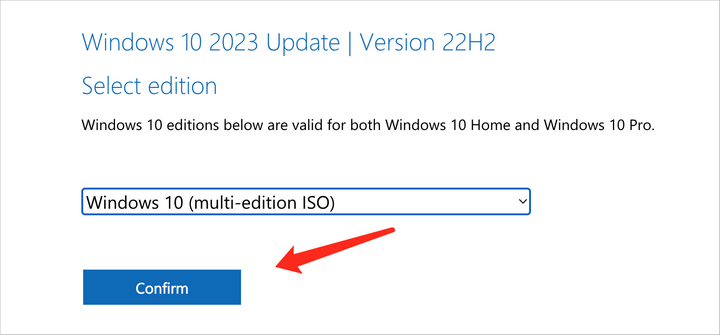
Step 1 Download Windows 10 ISO from Microsoft
Go to the official download page of Windows 10 and select an edition of Windows 10. Currently, only Windows 10 (Multi-edition ISO) is available. Click the Confirm button and choose a product language to install Windows 10. You will be presented with two download links in a few seconds.
Step 2Download and Install WinBootMate on Your Mac
WinBootMate has emerged as a reliable and efficient solution to create a Windows 10 bootable USB, even amidst the diverse range of Mac hardware available in 2024. This versatile software bridges the gap between Mac's operating system and Windows 10, providing a seamless user experience irrespective of whether you're running on an Intel-based Mac or the latest M1, M2, or M3 chipsets. With its user-friendly interface,WinBootMate automates the process of creating a bootable USB drive on Mac.
SYSCute WinBootMate
- Create bootable USB drive from Windows 11/10/8/7 ISO image.
- Graphics user interface with intuitive design. Great for average users.
- Automatically split installwim file into small pieces.
- Fully support legacy BIOS and UEFI boot modes.
- Run flawlessly on Intel and Apple Silicon Mac.
- Compatible with 10+ macOS versions, ranging from Yosemite to the latest Sonoma.
Step 3 Connect a USB Drive to Mac and Import Windows 10 ISO
Connect a USB drive (8 GB to 64 GB) to your Mac. Now, open the WinBootMate app from your Mac. Important Windows 10 ISO and choose the USB drive name from the drop-down list. We recommend ejecting other external storage devcies from your Mac.
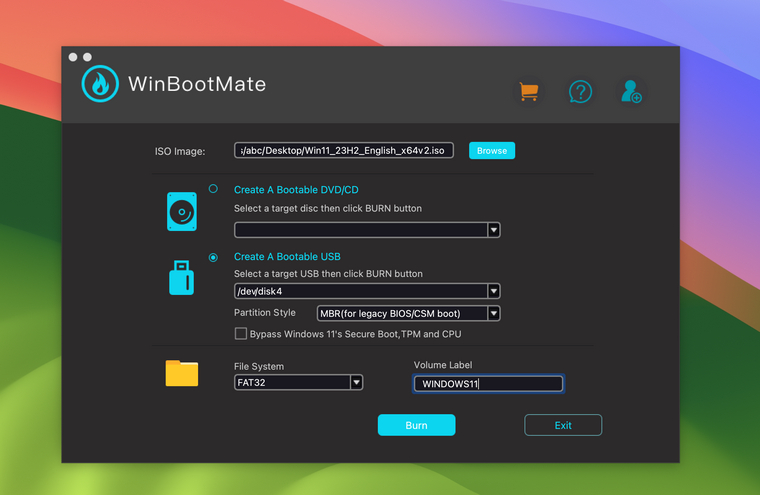
Step 4Burn Windows 10 ISO to USB Drive
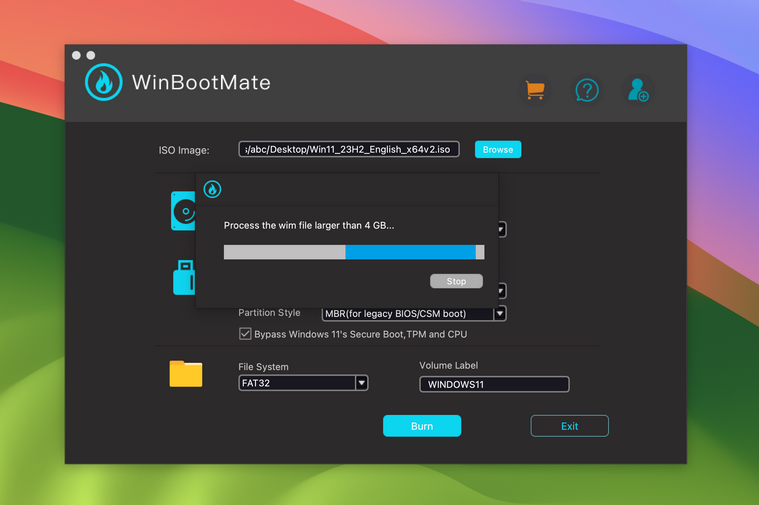
Click on the 'Burn' button to start the process. WinBootMate app will mount the Windows 10 ISO image and copy all files (except for install.wim) to target USB drive.
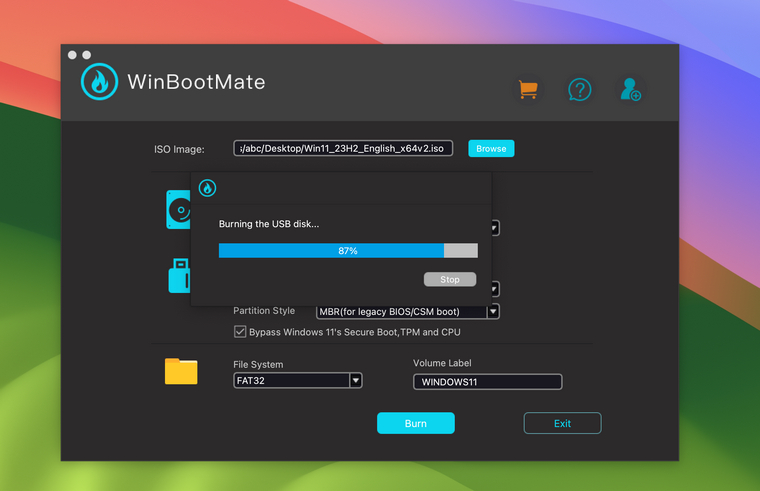
Step 5Split install.wim File
At the end of burning process, WinBooMate will cut the install.wim file into small parts and copy them to USB drive.
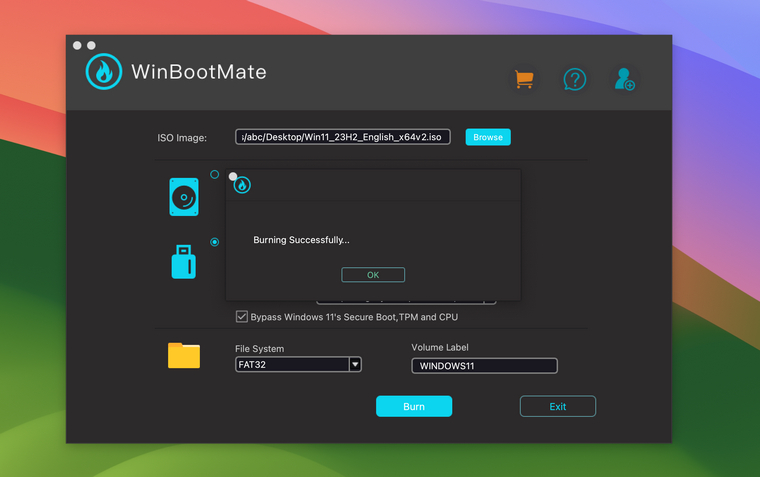
You will see a burning successfully message when the process is done completely.
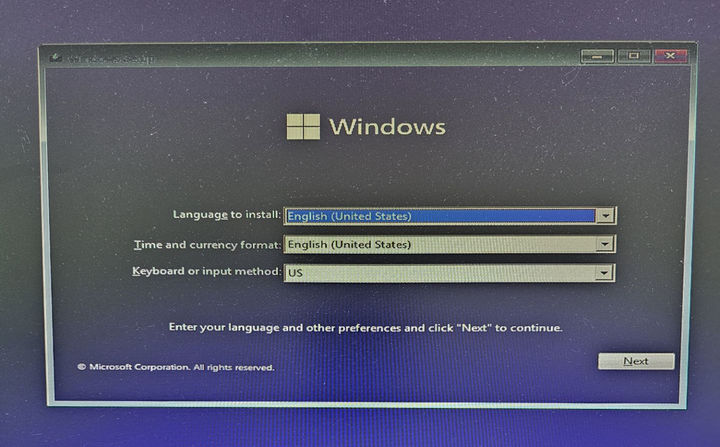
Step 6 Install Windows 10 on the Target Computer
Finally, connect the installation media to the targe computer and boot from it. When the Windows installation wizard shows up on the screen, you can now start installing Windows 10 on this device. However, it should take some time to complete the installation.
Easy enough, right? It only takes a few mouse clicks to finish such a complicated process. Go and test this amazing app on your Mac now!
Frequently Asked Questions
Q1. Can I create a Windows 10 bootable USB on a Mac without any additional software?
Yes, you can use the built-in Terminal app to create a bootable USB. However, there is no GUI and you have to type a set of complex commands by your own.
Q2. Does the USB drive's storage capacity matter when creating a bootable USB??
Yes, the USB drive should have at least 8GB of storage to accommodate the Windows 10 ISO and additional space for the bootable partition.
Q3. Will creating a Windows 10 bootable USB on my Mac erase all the data on the USB?
Yes, the process of creating a bootable USB will format the USB drive, which erases all existing data. It's essential to back up any important data beforehand.
Q4. How do I boot my Mac from the Windows 10 bootable USB?
Restart your Mac and hold down the Option key (or ALT for non-Apple keyboards) immediately upon hearing the startup chime. Then, select the USB drive from the boot menu.
Q5. What should I do if my Mac doesn't recognize the bootable USB?
Check to ensure that the USB is properly formatted and the bootable creation process was completed without errors. Try recreating the bootable USB or use a different USB port/drive.
Q6. Can I still use my Windows 10 bootable USB after the Windows 11 release?
Yes, the Windows 10 bootable USB will remain functional. However, if you wish to install Windows 11, you would need to create a new bootable USB specific for Windows 11.
The Bottom Line
The convergence of technology brings us to a point where the barriers between operating systems are becoming increasingly permeable. Creating a Windows 10 bootable USB on Intel or Apple's M1, M2, and M3 Macs becomes much more easier with the help of WinBootMate app. With the guidance provided, you now have the choice to install Windows 10 on a new computer. You can also dual boot Windows 10 along with macOS, which extends the functionality of your Mac. This is not just about run ningan OS; it's about embracing the fluidity of modern computing, where the lines between platforms blur, empowering you with the choice and flexibility to navigate a multi-OS landscape with ease.