How to Install Windows 11 without TPM and Secure Boot (11 Mins)
Can I still install Windows 11 without TPM or Secure Boot?
TPM 2.0 and Secure Boot are the two important hardware features required by Windows 11. Fortunately, you can still install Windows 11 on a PC without TPM and Secure Boot.
Read more...
Windows 11, Microsoft's newest iteration, brings a sleek interface, improved multitasking capabilities, and a host of other advancements designed to refine the computing experience. However, its installation prerequisites, including the Trusted Platform Module (TPM) 2.0 and Secure Boot, have posed challenges for users with older or incompatible hardware. This guide aims to navigate you through the process of installing Windows 11 without TPM and Secure Boot so you can enjoy the benefits of the new OS on a wider range of devices. By following these step-by-step instructions, you'll bypass these requirements safely and efficiently.
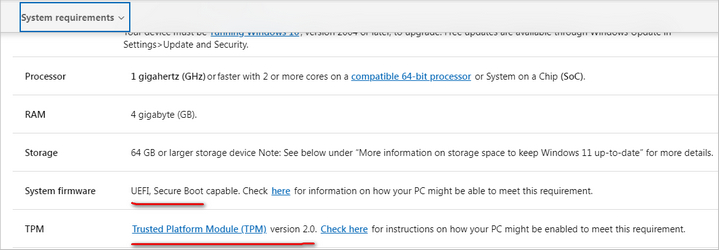
What is TPM and TPM 2.0?
The Trusted Platform Module (TPM) is a specialized chip on a computer's motherboard designed to enhance hardware security by securely storing cryptographic keys, passwords, and certificates. TPM 2.0, the latest version, offers a more robust and flexible architecture compared to its predecessor, supporting a wider range of cryptographic algorithms. It plays a critical role in enabling security features such as Windows BitLocker drive encryption and ensures a secure system boot, helping to protect against unauthorized access and tampering.
What is Secure Boot?
Secure Boot is a security standard developed to ensure that a computer boots using only software that is trusted by the Original Equipment Manufacturer (OEM). When enabled in a computer's UEFI firmware settings, Secure Boot verifies the digital signature of the operating system's bootloader and other critical software to prevent unauthorized programs, like malware, from running at boot time. This mechanism helps to protect the system against security threats and rootkits, ensuring that only verified and trusted software is loaded during the boot process.
How to Install Windows 11 without TPM and Secure Boot (Bypass Checking)
In this section, we will show you how to install Windows 11 on an unsupported PC without TPM and Secure Boot. Please don't worry! This step-by-step guide is quite simple with the help of SYSCute WinBootMate software, which has a native feature to bypass Windows 11 system checking.
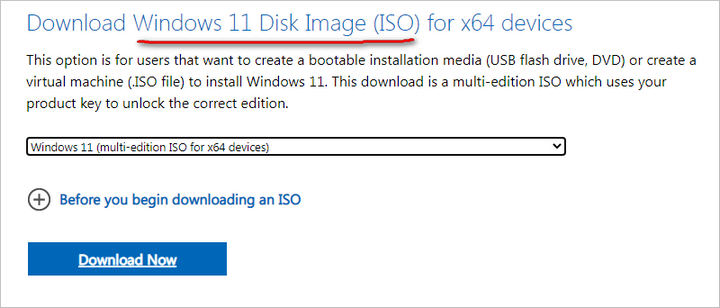
Step 1 Download Windows 11 ISO File from Microsoft
To download the Windows 11 ISO file, you can visit the official Microsoft website and navigate to the Windows 11 download page. Microsoft provides a few options for obtaining the ISO, including using the "Download Windows 11 Disk Image (ISO)" option, which allows you to select the edition of Windows 11 you wish to download. After agreeing to the terms and selecting your preferred language, you can then proceed to download the ISO file directly.
Step 2 Install WinBootMate on Your Computer
WinBootMate is an utility software we can take advantage of in order to install Windows 11 on an unsupported device. Please click the Download link in below and install the software on a PC or Mac to get started.
SYSCute WinBootMate
- Easily make Windows 11/10/8/7 bootable installation media.
- Bypass Windows 11 TPM, Secure Boot and other requirements in 1-click.
- Work smoothly on Windows PC and Mac, including Apple Silicon M1/M2/M3.
- Easy-to-follow user interface with modern design.
- Support both Legacy BIOS and UEFI booting schemes.
Step 3 Bypass TPM and Secure Boot Check from Windows 11 ISO
Before launching the WinBootMate app on your computer, please first plug in a working USB drive. Once you see the USB drive from file explorer, then open WinBooMate app and add the Windows 11 ISO into the WinBootMate tool.
Next, select "Create A Bootable USB" option. Your USB drive will be listed automatically under the device section. Make sure the drive name is correct. And then, choose the "Bypass Windows 11's Secure Boot, TPM and CPU" menu. This will remove system check during Windows 11 installation.
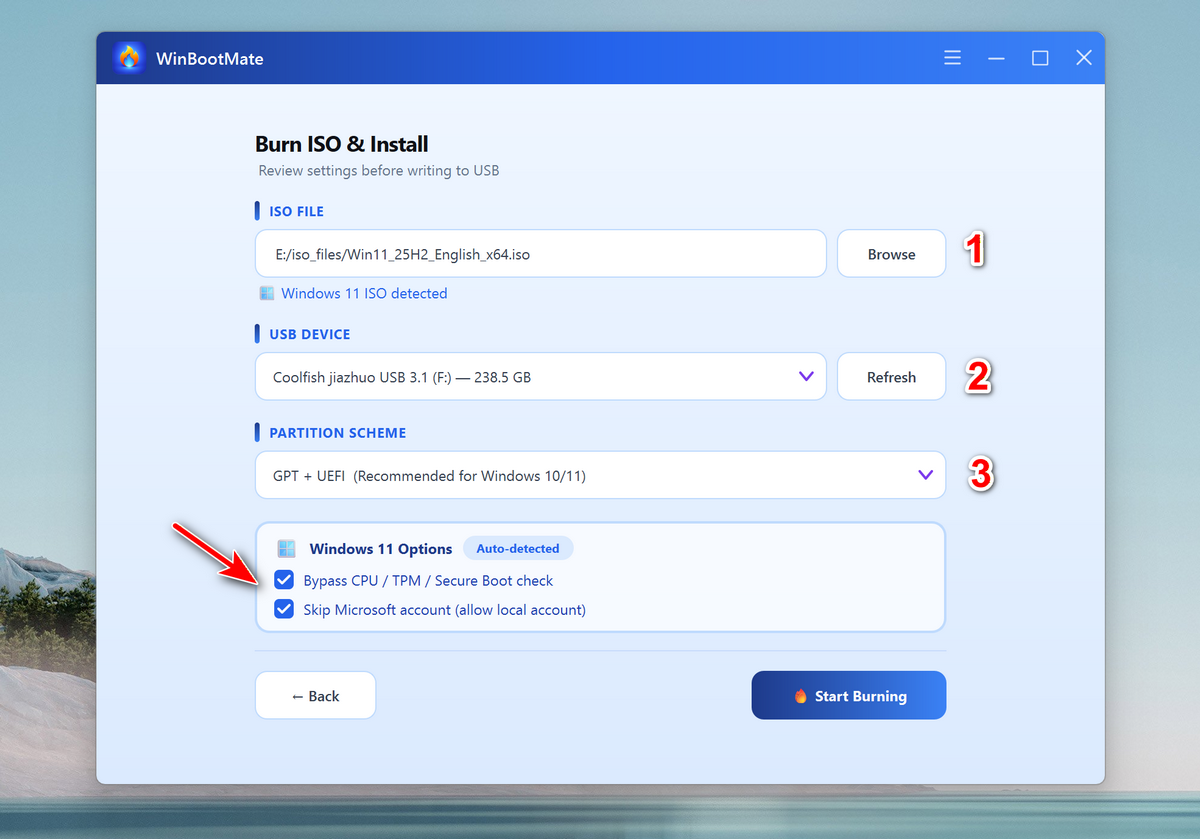
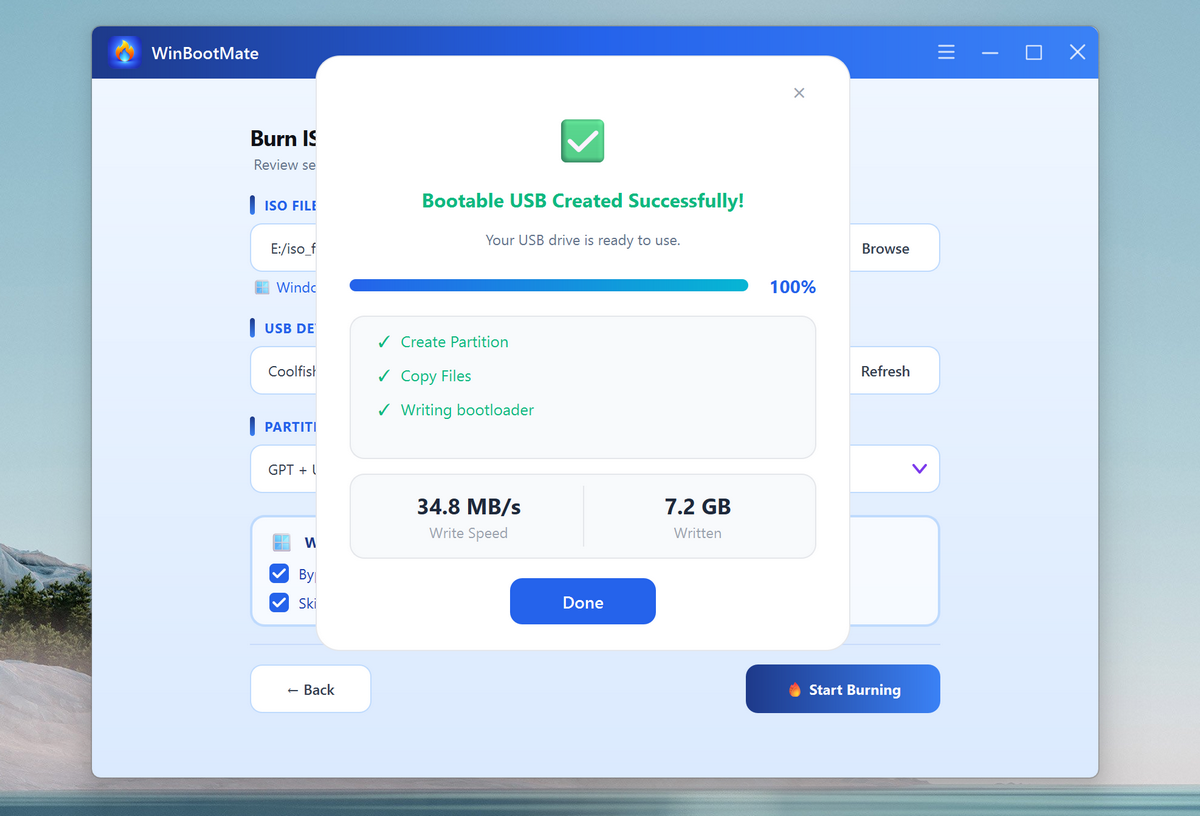
Step 4 Burn Windows 11 ISO to USB Drive
At this stage, all the preparation work has been done. Navigate to the bottom of the Window and click the Burn button to start extracting files from Windows 11 ISO and copy files to USB drive.
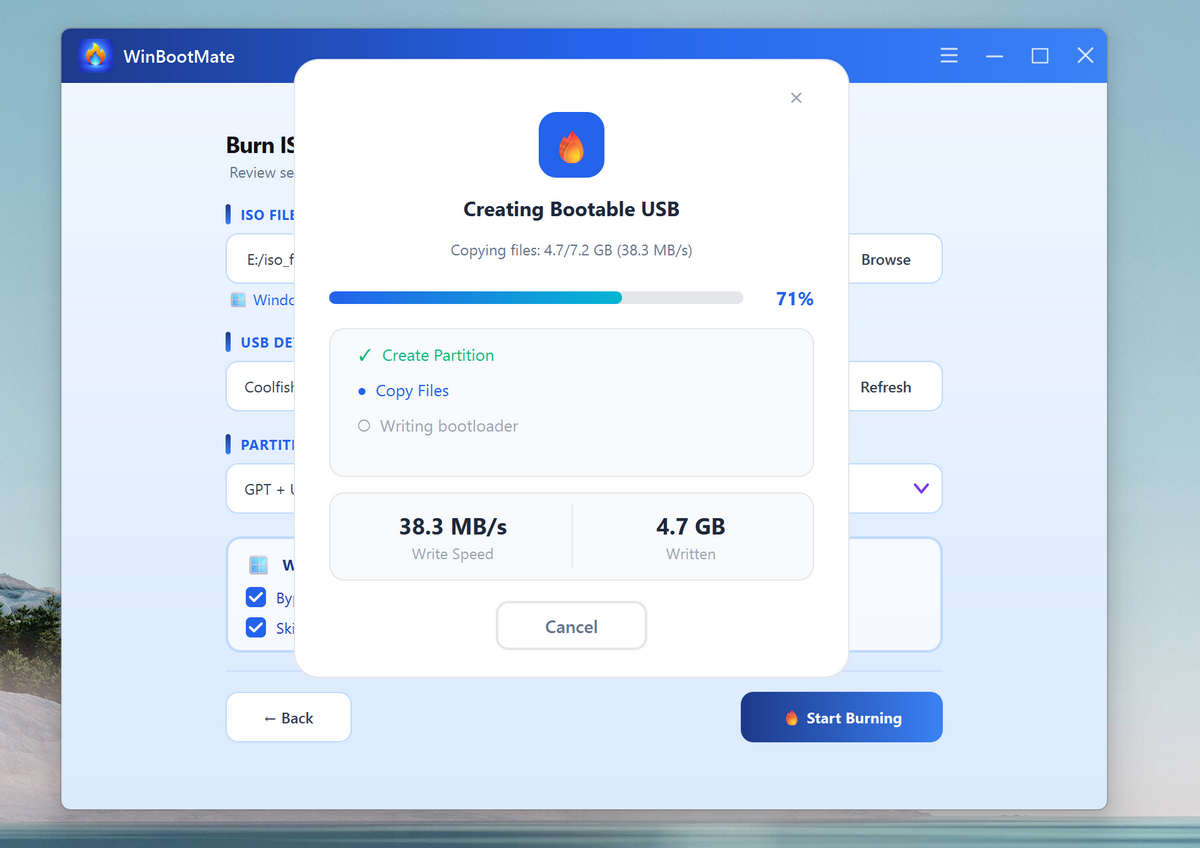
Usually, this whole burning process takes about 11 minutes, which heavily depends on the computer specs. When you see the follow screenshot, it means the task is done successfully.
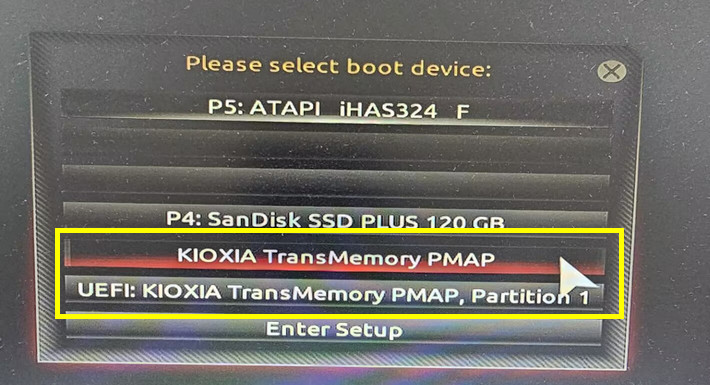
Step 5 Install Windows 11 on a PC without TPM and Secure Boot
To install Windows 11 from a bootable USB, first, ensure that the bootable USB drive containing the Windows 11 installation files is inserted into your computer. Restart your computer and access the Boot Menu by pressing the specific key during boot-up (commonly F2, F11, F12, DEL, or ESC, depending on your computer manufacturer). Once in the Boot Menu, choose the USB drive as the first boot device. This will cause your computer to restart and boot from the USB drive.
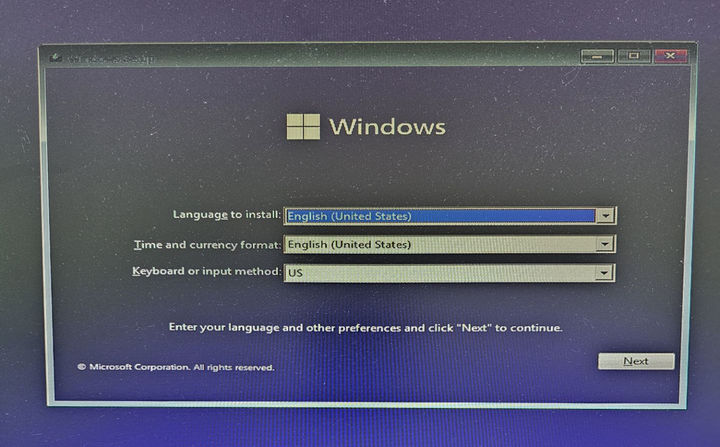
After booting from the USB, the Windows 11 setup wizard will guide you through the installation process. Select your preferred language, time and currency format, and keyboard or input method, then click "Next" to proceed.
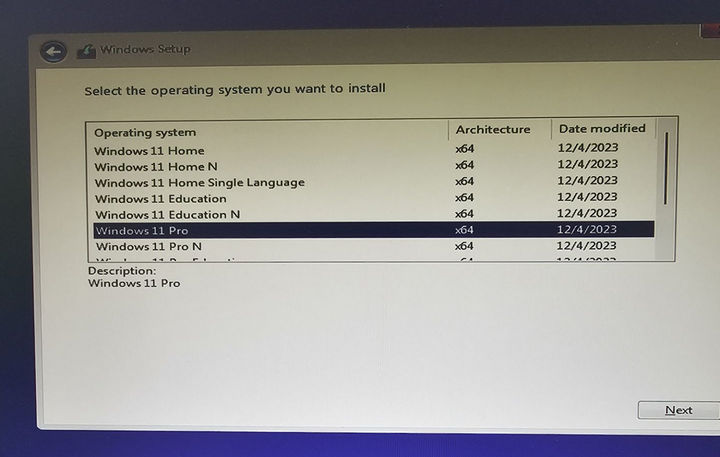
Now, choose the edition of Windows 11 you're installing, accept the license terms, and select "Custom: Install Windows only (advanced)" for a clean installation. Select the drive or partition where you want to install Windows 11.
Follow the on-screen instructions to complete the installation, after which your computer will restart a few times during the process. Once the installation is complete, you can proceed to set up your Windows 11, including configuring settings, creating or logging into a Microsoft account, and customizing your preferences.
Conclusion
Successfully installing Windows 11 without TPM and Secure Boot opens a realm of possibilities for users with older hardware who are unwilling to part with their devices or invest in new ones. This workaround not only extends the lifespan of your current setup but also democratizes access to the latest software advancements. While bypassing these requirements, it's crucial to acknowledge that these security features were implemented to safeguard your system. Therefore, after installation, it's advisable to take additional security measures to protect your device.By following the steps outlined in this guide, you've not only upgraded your operating system but also embraced the spirit of innovation that defines the digital age.